Happy First Day of Spring!
Here is a very easy DIY tutorial on a new spring wreath. This project is cheaper than purchasing a wreath that is custom and takes maybe an hour or two to complete. I know some of my followers will have seen the final product from this post because it is a wreath that I have had for a bit.
Necessary tools and supplies
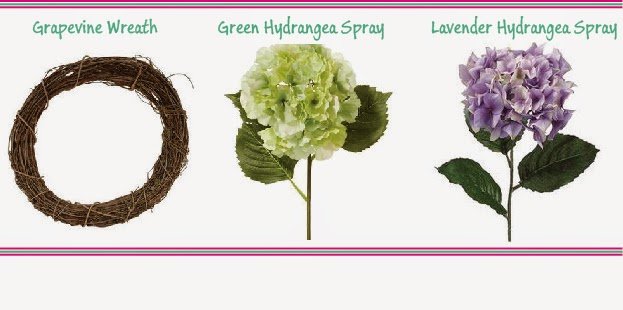
For this project you’ll need tools like a wire cutter to cut down the floral stems, a hot glue gun, small paint brush, and a plastic paint pallet or a paper plate. The supplies that you will need for this project are a grapevine wreath, wooden letter, flowers, and paint. I choose to shop most frequently at Joann’s for all my supplies usually because they have such a vast selection of all necessary supplies for all types of DIY projects.
Whenever I buy supplies for a DIY project I make sure that I have coupons at hand. If you DIY and don’t receive coupons via email or snail mail from places like Joann’s, Michaels, or Hancock, I highly suggest getting on their mailing list. The grapevine wreath was $4.99. The 9.5″ wooden letter was $2.99. The paint I already had, I just mixed some red and blue to make my purple. And lastly, for four hydrangea spray’s I paid about $24.00, however, prices do vary widely. When it comes to flowers at Joann’s, they usually have sales on their flowers so prices are changing regularly. I can’t say what my actual total was at the register because like I said, I always have coupons or I buy when things are on sale! I do know that I paid less than $32.00.
First things first~
You can customize your wreath in so many different ways from color themes, seasonal themes, holidays, and different flowers/accents. But not only that, you can also do your house numbers versus your last name initial. The possibilities are endless. My inspiration was of course on Pinterest
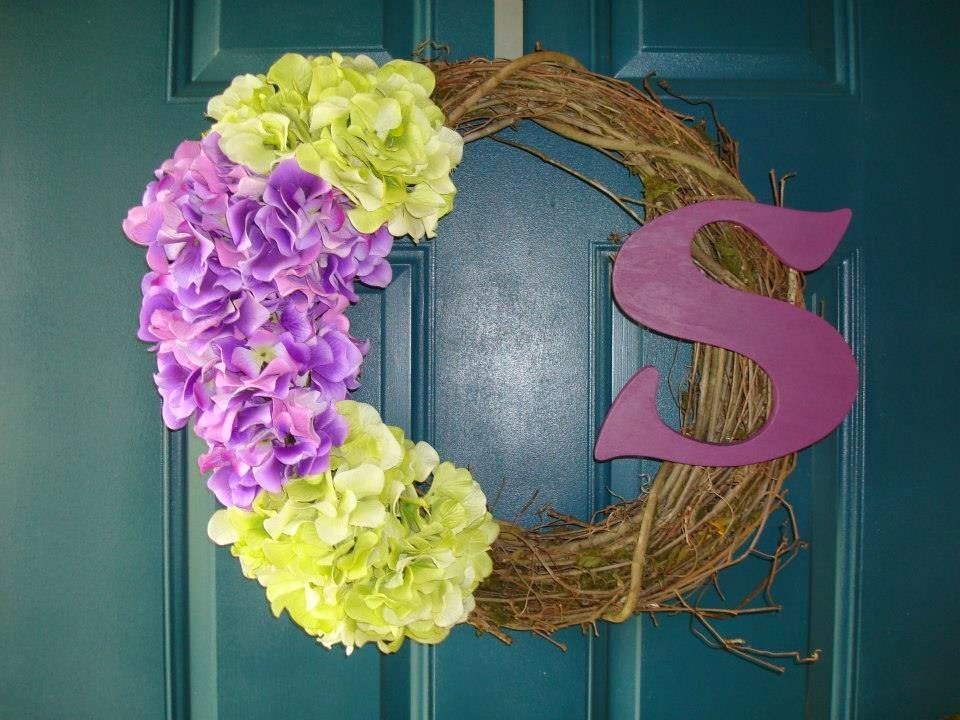
Tada!
Here is the finished product! Keep in mind that for the amount of time and money it takes you to accomplish this you’re saving greatly compared to buying one off of etsy.com (Prices vary from $45 to over $100). For my next wreath I am going to step it up a notch with adding some burlap and different colors, and maybe making it specific for a holiday!