Easiest Shelves EVER!
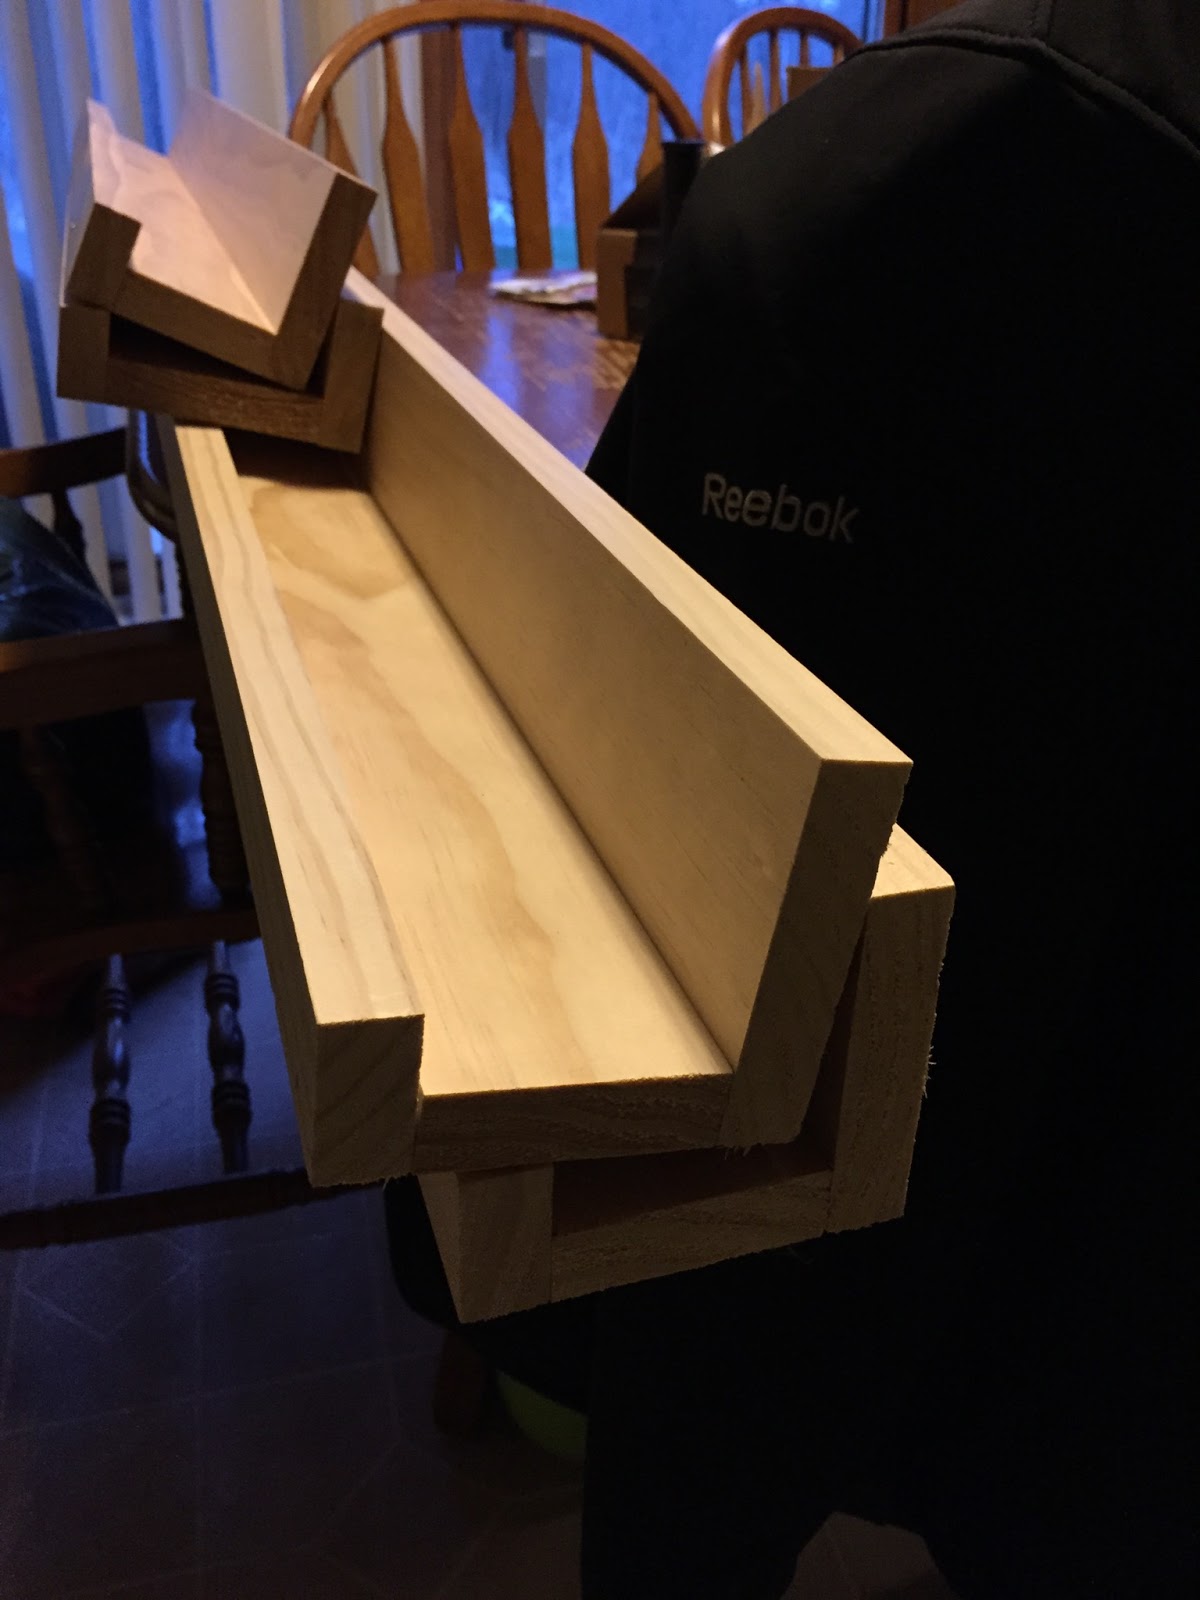
Perusing Pinterest I came across the perfect shelving solution to our big-long wall problem. Here is the link to my (P)inspiration: http://www.tysonandjanessaparker.blogspot.com/2013/10/diy-picture-ledges.html – You’ll notice in her directions she does say that you should purchase a higher grade wood to have less sanding and warping, in other words less headaches! I heeded this advice and it made my job so easy!
Before shot~Boring wall… and don’t mind the stingray!

Material Girl~
Materials you’ll need to make 2 • 3′ shelves and 2 • 5′ shelves (2 • 8′ shelves cut down) is as follows:
 |
| one of these is different than the others… lol |
Literal time frame for this project was 3 days, however one could complete it in the same day if you had the time. I did the cutting and assembly on day one (Wednesday after work). Day two I sanded and painted (Thursday after work). Day three I finished up by painting the bottoms and hung (Friday after work).
That’s it!Hang it Man~
After everything was painted I then went to the wall where it would be installed and roughly drew marks where I wanted them. I held the shelf up to the wall and asked my hubster what he thought of the placement. Once we had good placement, (distance from the top and bottom of the T.V. with enough space in the middle for the art pieces) I took our 6′ level and drew a straight line. On that line I marked out my studs using my stud finder. Then I held up my shelves to the wall and drew a faint mark at each point that there would be a stud and pre-drilled a hole. Then I just started the screws in their hole till they were flush with the backside of the shelves, then held it up and simply screwed it in.
Once the shelves were all up I took a small paint brush and the same white paint and painted over the screws. Contrary to my P’inspiration link, I did this because I didn’t put a ton of art on the shelves and you would be able to see the screws.
Viola!
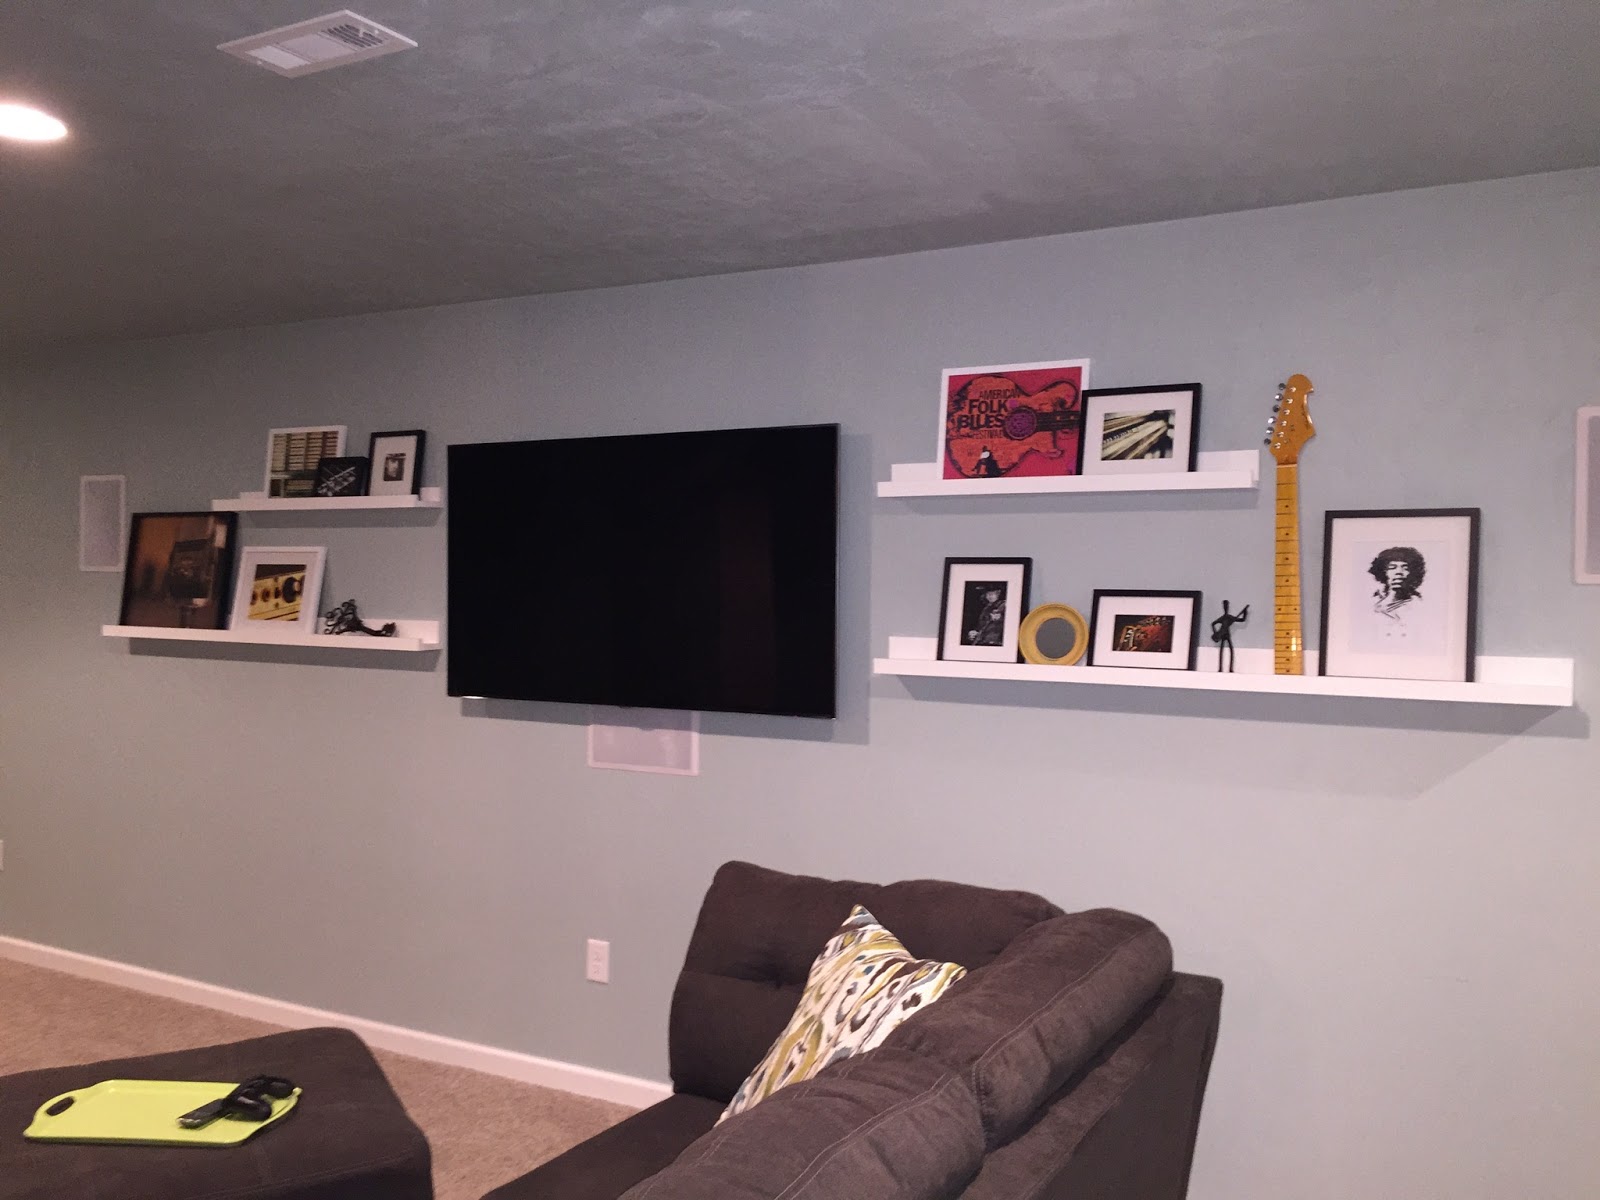
Panned out for you! (don’t mind the clutter after all, we do live here 😉
